
In early December 1998, our first year in Arizona, we found a surprise on the doorstep: a wire whisk, tied with a ribbon and a note from our neighbors that read, “We WHISK you a Merry Christmas!” How nice, I thought — I’ll bring them some cookies. Then, as progressively more elaborate and creative “neighbor gifts” appeared, the surprise turned to dismay. Each new gift signified one more I’d have to make in return.
It’s safe to say I was initially not a fan of the neighbor gift tradition. I had virtually no budget for 40+ gifts, no idea what to give, and very little time in the holiday frenzy to make or deliver them. Bah humbug.
It took a couple years, but I eventually came around. The key, for me, was finding something I could easily replicate year after year — a “signature” gift: homemade hot fudge and caramel sauces in reusable glass jars. Having two, no-fail recipes I could make ahead and store in the fridge until delivery day greatly reduced the stress factor and freed me up to focus on the fun part: connecting with neighbors and friends. Plus, it’s a relatively budget-friendly option, and I could add a little variety just by switching up the container.

Although the hot fudge was never refused, the most anticipated was always the caramel sauce. (I have one friend who called me to confess she ate an entire jar, cold, in a single sitting.)
I’ve experimented with plenty of caramel sauce recipes since, but I keep coming back to this one – it’s easy to make and consistently delicious, hence “favorite.” There are no tricky ‘do not stir’ warnings, and no candy thermometer needed — just throw everything (except the vanilla) into a big pan and give it a stir every so often. It does take a little babysitting, but it’s mostly hands-off.
It’s a thick sauce, and a bit lighter in color – imagine a melted version of those homemade soft caramels that come wrapped in wax paper. I love it cold, straight out of the jar with pretzel sticks and heated, served with a warm brownie and chopped pecans. (If you’re serving on ice cream, make sure it’s good and hot; otherwise the ice cream freezes it into chewy candy.)

The basis for my recipe comes from the 1996 edition of Betty Crocker’s New Cookbook – a present from my sister and still one of my favorite cookbooks ever. I tweaked it by adding just enough flaky sea salt to bring out the sweetness (if you’re not sure about the salt, start with ½ teaspoon), and reducing the butter by about half.
Favorite Salted Caramel Sauce
Adapted from Betty Crocker’s New Cookbook [1996]
Yield: About 2 cups
1 cup sugar
1/4 cup butter
1 cup heavy (whipping) cream
1/2 cup light corn syrup (Karo brand is non HF)
1 tsp. flaky sea salt (I use Maldon)
1 tsp. pure vanilla
—
Heat all ingredients except vanilla to boiling in heavy, large saucepan (mixture will double in size during the cooking process) over medium heat, stirring constantly; reduce heat to medium-low. Cook about 30 minutes, stirring frequently, until sugar is dissolved and mixture is caramel colored. Stir in vanilla. Pour into containers and allow to cool. Store in refrigerator up to 2 months. If desired, sprinkle top with a few flakes of sea salt just before delivering. Serve hot or warm.

All images by Christopher Halloran Photography
A few favorite containers used over the years:
Crate and Barrel: Weck 4.5 oz. canning jar
IKEA: RAJTAN and BURKEN (mini version, currently not shown on the website)
World Market: White Lidded Spice Jar and Weck 1/5 Liter Glass Jar
Walmart: Ball 4 oz. Quilted Jelly Jars (pictured in this post)
Michael’s: Check the wedding department favor section for a great selection of options, including the Glass Snap-Top Jars, then use the 40%-off coupon.
Budget Option: One year I couldn’t find enough glass containers, so I packaged the sauces in 4 oz. deli containers from Smart and Final and presented them in a clear cellophane bag tied with a ribbon.
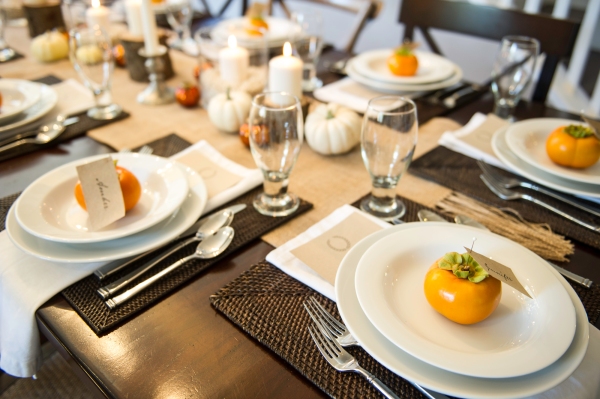
When my friend Hillary asked me to help co-host her gourmet club dinner last month, I happily accepted — though I was a bit intimidated at the thought of preparing a multi-course meal for 12. Luckily Hillary’s a veteran, and with the help of her darling daughter/sous chef Avery, we had a great time choosing a theme, testing recipes and creating a menu. While the food portion of the evening had a few hiccups (I may never be invited back!), overall we were pleased with how everything turned out, set against the backdrop of Hillary’s beautiful home.

We settled on “Fall Fête: A Taste of Autumn” for our theme, and decided to play off a traditional autumnal color scheme by adding natural, earthy and light elements. We also “lightened up” economically by using mostly items we already had on hand — or were readily available in nature — for serving and decorating. White candles perched on disks cut from a piece of firewood, glass cylinder vases filled with dried white beans, mini white pumpkins and a few golden-orange ornaments scattered on a rustic burlap runner made a simple, and reusable, centerpiece.
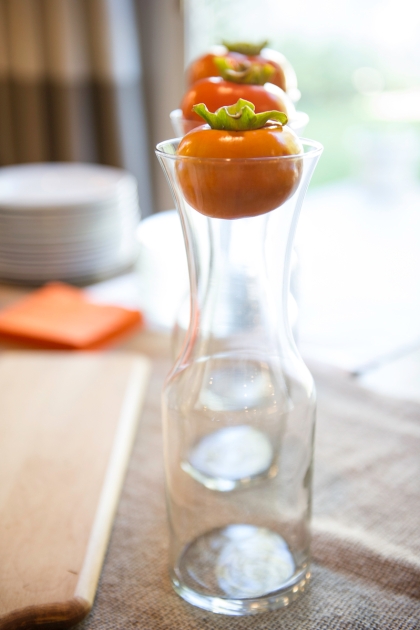
We stuck to a palette of mostly whites, tans and browns, with pops of bright orange provided by my abundant backyard persimmon tree. (They also made handy bottle stoppers for our cider-tasting bar.)

Since we were on a tight time frame, we created e-mail invitations using Paperless Post. If you haven’t tried sending invites this way, I highly recommend! They have a fantastic selection of FREE templates, and although it’s always nice to get an invitation in the mail, sending them electronically allows you to easily track opens, manage the guest list and send follow-up reminders. Read more…

Until about 10 years ago, I detested egg salad – and really anything having to do with hard-boiled eggs. Luckily I discovered my prejudice was really against yolks, and now actually crave this egg white salad, particularly on fast days.
To me, the secret to any good egg salad is mashing the yolk to a fine paste before adding the rest of the sauce ingredients. The result? A smooth, creamy consistency with no unpleasant yolky chunks. Read more…

This salad cured my lifelong belief that canned tuna requires mayonnaise. The beans mellow the tuna, and the fresh lemon juice (a must!) brightens all the flavors. On fast days, we serve it on fresh spinach or in lettuce wraps; or, if we’re feeling particularly decadent, on a 100-calorie whole-grain sandwich bun. Read more…
Trying Out the Fast Diet
I usually try to steer clear of fad diets, so when my friend Marti sent me a New York Times article about a best-selling British book called The Fast Diet, I set it aside. But when the mysterious new diet kept cropping up in conversations over the next several weeks, I had to check it out.
The why.
Although it seems I’m always trying to shed a few extra pounds, the diet appealed to me for its other suggested benefits as well – lowering bad cholesterol, reducing cancer risk and, of special interest to me due to family medical history, stimulating brain activity. (I found more helpful info on the brain benefits of intermittent fasting in this article published in Johns Hopkins Magazine: “Don’t Feed Your Head.”)
Intrigued, I sent the NYT article to my husband and he agreed to start the diet with me on April 1. (That way if we chickened out — April Fools’!) Now three weeks into it, we’ve been getting lots of questions so I decided to document the experience here. I’m not in any way suggesting this is a must-do for everyone, and I’m still not entirely sure it’s not a fad, but I’ve been pleasantly surprised with the diet thus far and it seems easy enough that it could actually transition into a lifestyle change.

Target skirt | Madewell swimsuit | Ray Ban sunglasses | Old Navy t-Shirt | Madewell Chambray shirt | Essie nail polish | J.Crew tote | Target watch | Bamboo sandals | Topshop scarf
Recently, my husband stopped me on my way out to ask if I had anything on the calendar for the following weekend; I said no. By the time I returned, he’d booked flights to visit his father in Hawaii. With only a few days’ notice and a single carry-on bag, I had no idea what to pack.
Poor me.
After Googling “what to wear to the beach Hawaii” and not finding what I wanted – barely there cutoff shorts and teeny bikinis don’t really work for me – I started from scratch. Though “beachwear” was a given, early spring weather in Honolulu can be unpredictable. Plus, whatever I packed for the beach would also have to work for lunch, sightseeing, shopping and anywhere else my photographer husband might want to stop along the way.
I decided to stick with a basic palette of black, white and gray — a strong trend for spring (though when is it ever not appropriate?) and I already own a lot of it — punched up with some chambray, coral (it is Hawaii, after all), and a few gold accessories.

Image: InStyle March 2006, illustrated by Edwin Fotheringham
After a week of living with my newly edited closet, I realized something: my clothes were much better organized, but I still had nothing to wear.
I’d stand there hoping for some sort of revelation; when none came, I’d put on the same jeans and shirt I’d worn the previous day.
It was frustrating. Sure, I’d gone shopping before and come home empty handed, but it seemed ridiculous that this was happening at home — hadn’t I already hand-picked all this stuff?
I knew I needed to shop my closet, but I didn’t know how.
So I decided to use some of the time I was saving by not shopping to figure out how to actually wear the clothes I already owned — and discovered two easy tricks.

The first order of business after deciding not to buy anything new for a year was making peace with my closet. Over the years I had read books, saved articles, attended — and even taught — classes on organization, but somehow never managed to extend what I learned to my wardrobe.
Every so often I’d tidy everything up and attempt to organize it, but after a few weeks the chaos would return.
Part of the problem was too much stuff — hangers crammed so tightly and stacks of sweaters piled so high that it was impossible to see what I had — but mostly it was laziness. Since I basically wore the same 10 things every week, my ‘uniform’ of jeans and some type of knit shirt languished on the closet floor until I felt enough mercy — or shame — to wash them.
But realizing that I would have to rely solely on the contents of my closet for everything I would wear over the next year was the wake-up call I needed: time to start practicing what I’d preached.
Where to begin? With a little motivation. Closet organization is not rocket science, and there are a bajillion resources out there — books, magazines, blogs, talk show segments — to help.
All basically come down to some form of three basic principles: Sort, Edit & Organize. Read more…
Nothing New for a Year
![]()
Back when I started this blog, I wrote about how my experiment with not buying anything new for more than a year greatly influenced the desire to edit my life in other ways.
Although it’s now been several years since my self-imposed moratorium ended, that experience continues to influence how, when and why I shop, and what I shop for.
This is not intended to be a condemnation of shopping, nor a judgment on what others choose to do. Rather, it’s something I tried that had a profound, lasting, positive effect on me, and I share it with the hope that it might help someone else.
So here goes…
Why I did it.
During the annual Labor Day International Street Fair in Orange, I checked out a few of the shops that line the streets of the charming downtown — mostly to get out of the heat. Turns out it was my lucky day — in the Antique Depot on Glassell Street, I found a brand new leather jacket for $24.
A black leather jacket had been on my wish list, mostly inspired by the iconic Francoise Hardy photo, and although this one wasn’t exactly what I was looking for, the price, quality and classic shape were too good to pass up:

But after just one night at home, the jacket had filled my closet with an overpoweringly sweet, musty stench — no bargain was good enough to justify that smell.
I’d read that Vogue editor Meredith Melling Burke machine washes and dries all her leather jackets, so I dug around and found more info on machine washing leather here and here.
Armed with my research, I decided to take the $24 risk. Spoiler alert: glad I did.

